This page contains affiliate links which give us a small commission at no cost to you. You can read our full disclaimer here.
So you’ve decided on SiteGround as your web host provider. Good choice! Choosing a web host was the hard part. Follow my step-by-step guide below to kickstart your blogging adventure!
STEP 1: Choose a plan
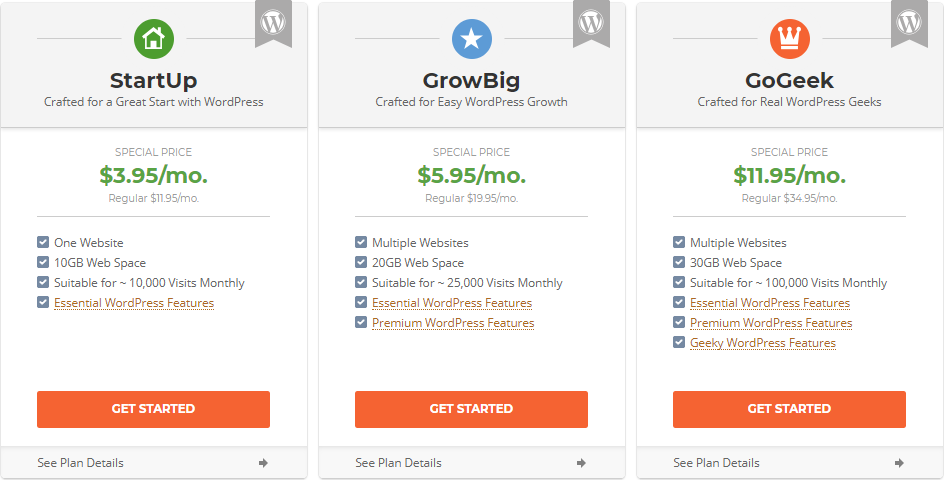
There are 3 main plans to choose from – StartUp, GrowBig and GoGeek.
- If you’re just starting out and plan to work on just one site, the StartUp plan is the perfect budget-friendly option.
- If you’re looking to create multiple sites, get more storage space, or get a free site transfer, the GrowBig plan is for you.
- The GoGeek plan is the ultimate deal with all the bells and whistles. It offers a free site transfer, free backups on demand, one-click WordPress staging, higher bandwidth, and PCI compliant server (* important if you’re planning on starting an e-commerce store or selling things on your site and processing the payments on your site).
Click on the “See Plan Details” buttons for a more extensive side-by-side comparison of the three hosting plans. Keep in mind that the introductory price is valid on your initial purchase and will renew at the full rate (I’ll explain that more in Step 3).
STEP 2: Choose a domain
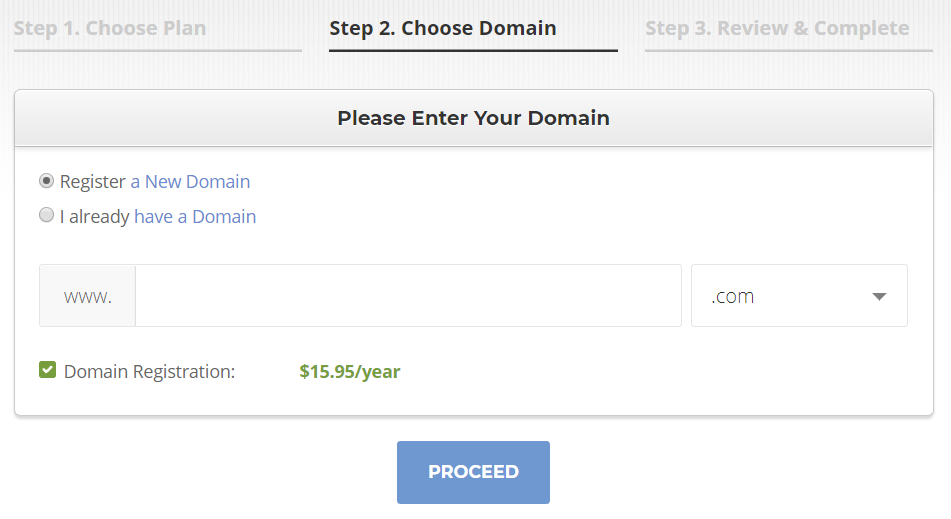
If you don’t already have a domain name, you may choose to register one with SiteGround. However, I recommend registering it with NameCheap because it’s safer to keep your hosting account and domain name registrar separate. If one account gets hacked, the other is still safe.
With NameCheap, you also get free WhoisGuard privacy, which hides the name and address tied to your domain name.
STEP 3: Review & Complete
You’re just one step away from starting your site. Fill in your contact information like email address, name, address, payment information, etc.
Pay close attention to this last section as it’s the most important part of the signup process.
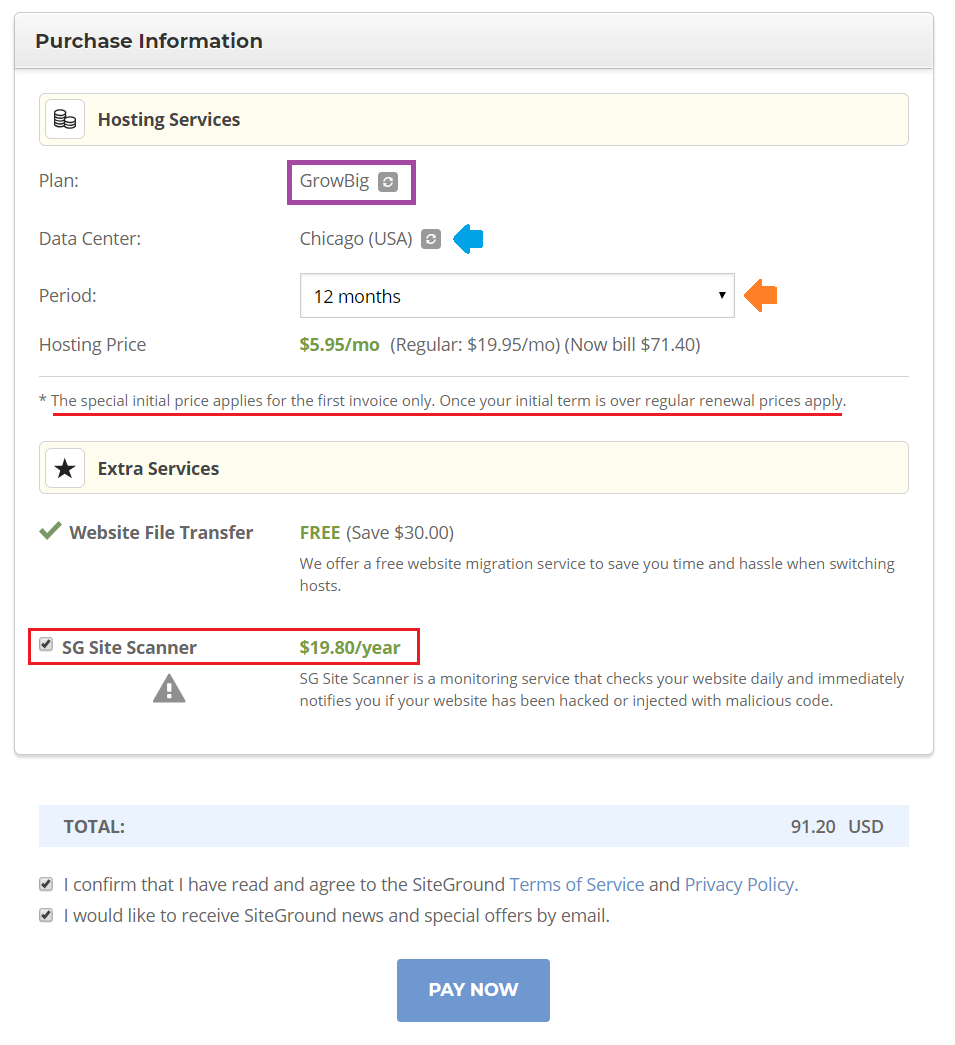
Double check that the plan you selected is correct; you can change it here by clicking the gray icon next to the plan name.
Data Center – This is where your site will be located. The closer your site is to your target audience, the faster your website will be. If your target audience is in the USA, leave the default option of Chicago (USA). For people in Europe, there are data centers in Amsterdam and London. For Asia there is a Data Center in Singapore.
Period – This is how many months you want to sign up for at the special introductory price. After this period is over, you’ll be charged the regular monthly renewal price. At the time of this writing, you can lock this deal in for up to 36 months. You’re getting an amazing deal on your initial purchase, so make the most of it!
Website File Transfer – This is free for GrowBig and GoGeek plans; no extra opt-in required. The transfer is for sites that aren’t running on WordPress. It’s free to transfer a WordPress site thanks to a free SiteGround WordPress plugin.
SG Site Scanner – OPTIONAL extra service that actively monitors your site daily as a safeguard against hackers and malware – more information. It’s not necessary for getting your website up and running, but is a good option if you’re concerned about the security of your blog. I have my own tech guy, so I didn’t pay for this option.
Double check your total bill, agree to SiteGround’s Terms of Service, and complete the transaction with the Pay Now button.
The process should be relatively quick and you should get the following message:
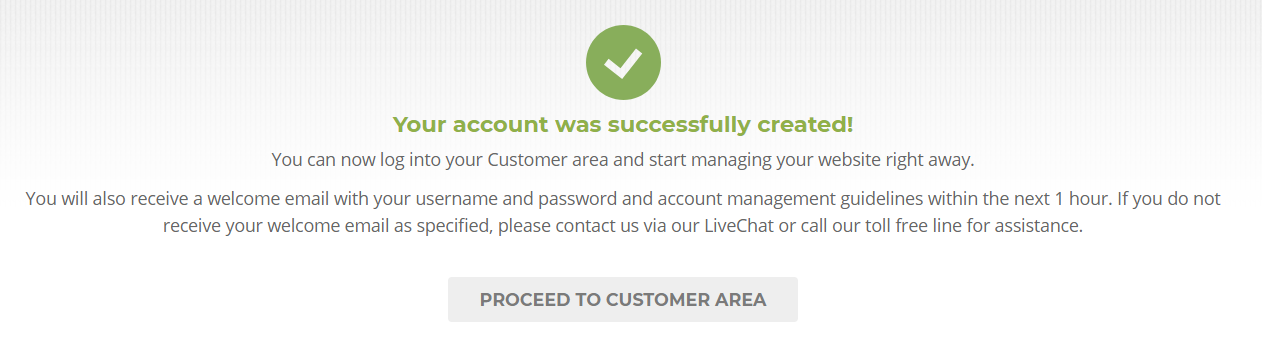
Congratulations, you’re one HUGE step closer to getting your blog up and running! I hope this guide helped make this process as easy and painless as possible.